The macaron is a beautiful but tricky little thing. It started life as an ordinary biscuit back in the Middle Ages but in the 1930’s it was elevated to the world of haute couture petits-fours to become the beautiful and complex thing we know today. You can read more about the history here, but this post is all about the whys and wherefores of the techniques behind making the macaron.
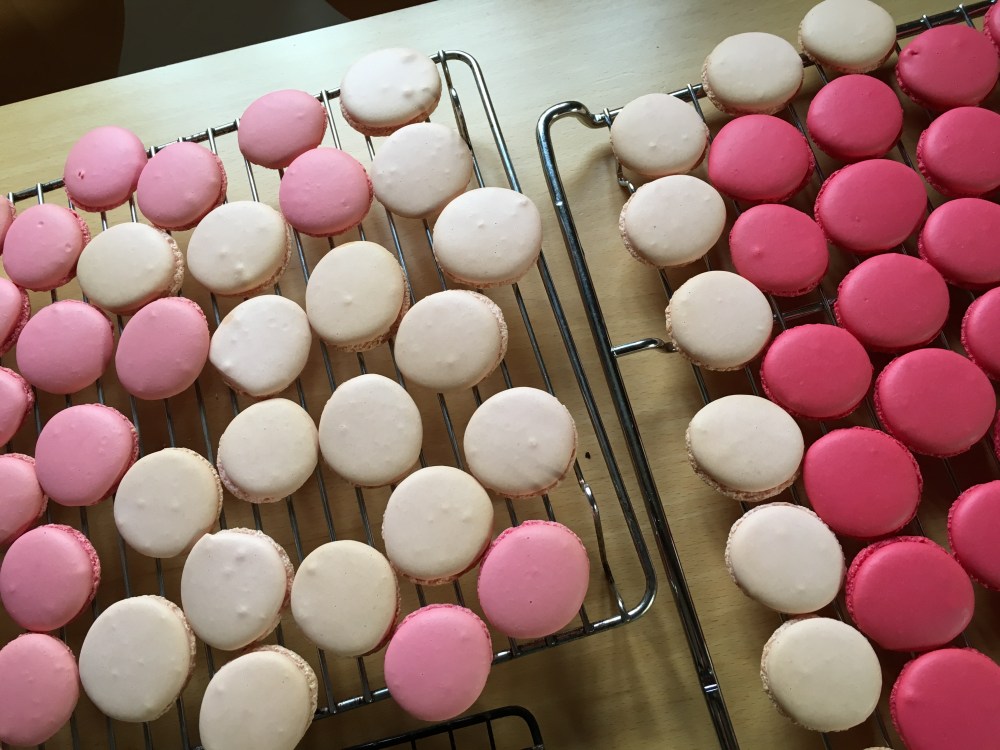
I started my journey with this little treasure 5 years ago after watching an episode of The Great British Bake Off. I was driven to a cooking class run by Edd Kimber after my 4th attempt resulted frustratingly in a single sticky sheet of macaron mixture. That particular batch ended up in a trifle (even bad shells are delicious). Edd got me over the hump with the basic technique and I have done them many times since then but I am by no means an expert yet (as you can see from the less than perfect shells below).
The main reason these are so tricksy is there are 10 stages all of which can go wrong. What are those 10 stages? Well here you go
- Leave the egg whites to age for a few days
- Sift the ground almonds to ensure the shells don’t have lumps in them
- Make the Italian meringue and add colour (beware – they lose colour in the oven)
- Make a paste of ground almonds, egg white and icing sugar
- Combine the meringue with the ground almond paste and beat it down
- Pipe to perfect identical and smooth circles
- Tap out any air bubbles
- Allow to air dry
- Bake
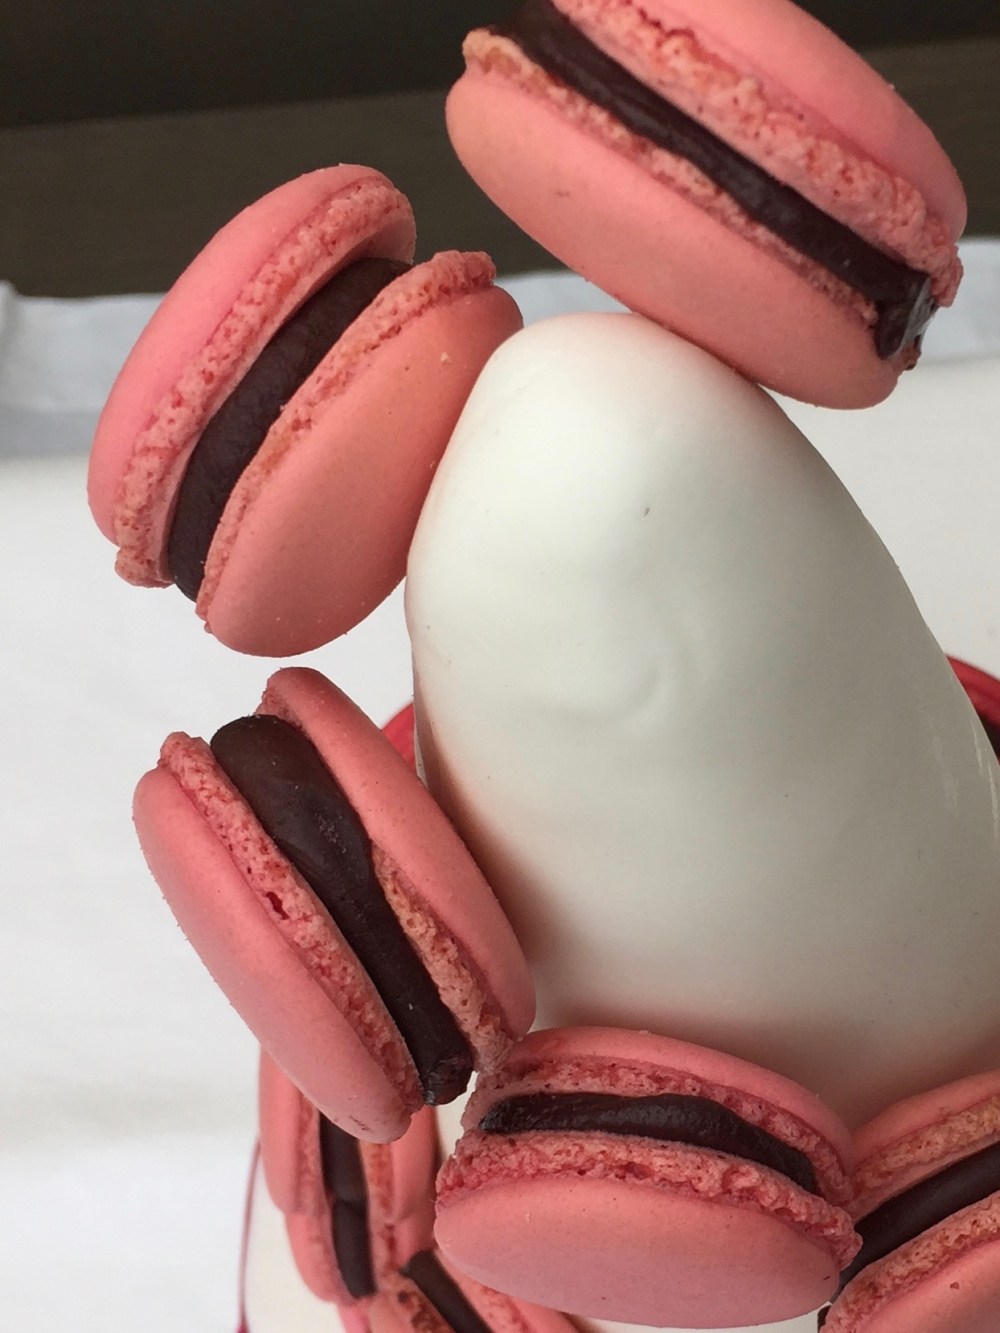
- Fill with a filling of your choice and allow to mature for a day before eating
I see lots of pleas on the internet questioning why these stages exist and whether they are important. The short answer is yes they are, and here is why.
Like all meringue, the bake is about drying out the mixture rather than baking it and with the macaron that particular technique is taken to a new level of complexity with an added twist. With normal meringue the shells often crack in the oven. With macarons what many of the processes are about is getting the moisture level of the mix to a point where the shells rise (from the steam that comes from the remaining water) just enough without the shells cracking.
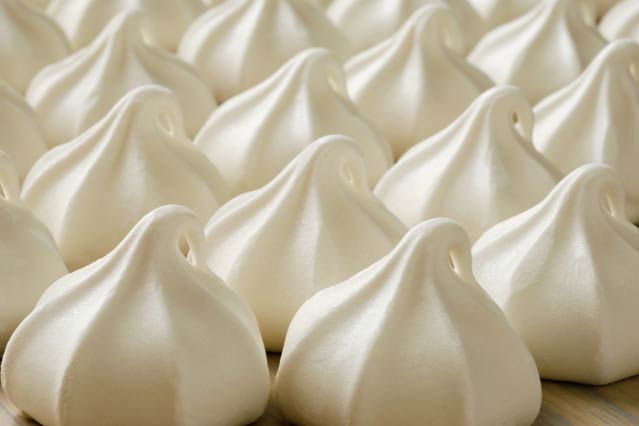
The other point of the processes is getting the mix to a fluidity point whereby they hold their shape but are utterly smooth and shiny. Without this process, the shells would be more like a classic piped biscuit or meringue when piped, like the one’s below. They are certainly beautiful but they are not a macaron.
So here is the detail about each stage……
Ageing the egg white
The reason you do this is to allow water to evaporate from the egg whites. The safest hygienic way to do this is to put your egg white in the fridge for 3 or 4 days in a container covered in cling film, with a slit in it. If you haven’t had a chance to do this, another way is to put fresh egg whites in the microwave on full power for 5 seconds. If you have used the fridge method please remember though to allow your egg white to come back up to room temperature before using it.

Sifting the ground almonds
This is my least favourite part of the process and frankly the one I really don’t enjoy doing. None of the recipes tell you what a pain it is, but it is absolutely essential if you want a smooth shell. If you don’t you will see ground almond bits in the shell. I always combine the ground almonds with the icing sugar and first put it through a grinding mill or food processor. You need the icing sugar to ensure when you grind the mix it doesn’t turn to a paste. Then I sieve the mix by pushing the almonds through the sieve (they really don’t sieve after a while) until you have about a dessert spoon of ground almond bits in the sieve. It takes forever and I recommend doing it the day before, but you can see the difference in the picture below – pre sieve on the right, post sieve (with icing sugar) on the left.


Making meringue
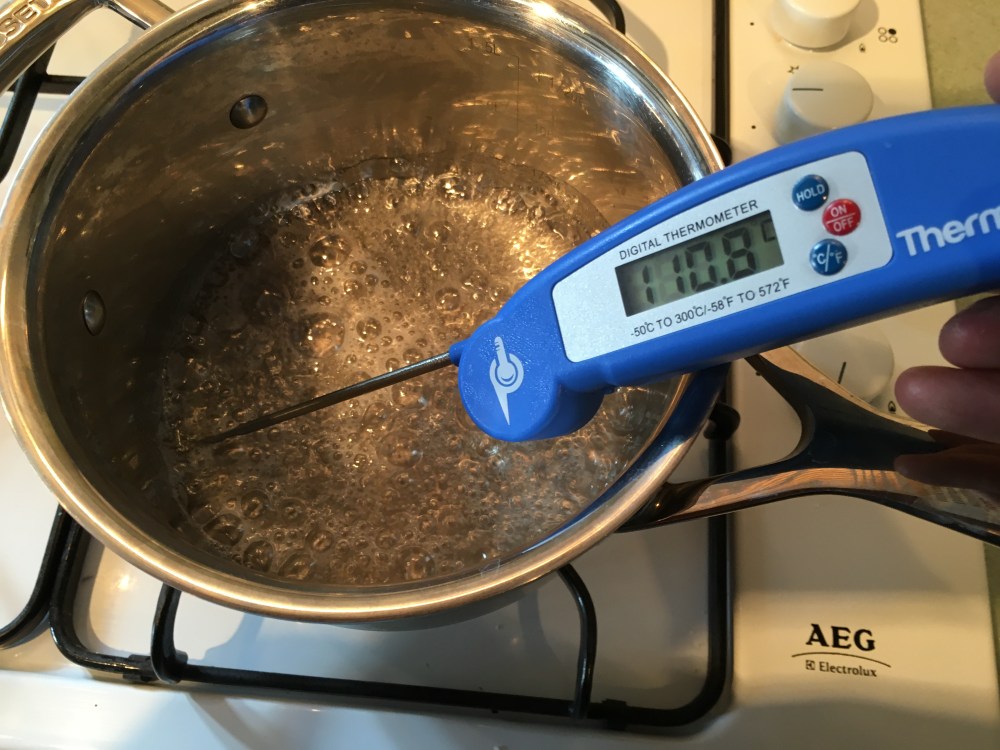
The meringue you make with half the egg white is either done using the Italian or French Method. The Italian method is better as not only does it cook the egg white but produces a drier and more stable meringue than french meringue. You have to whisk the initial egg white to get it very stiff and dry (and therefore taking more moisture out). You also have to heat the boiling sugar syrup to 118c because it will only get to that temperature once enough moisture has boiled off. The final whisking back down to body temperature finishes off the drying process, not to mention making a perfect glossy meringue.
Adding Colour
Wherever possible avoid the very liquid food colouring (that moisture thing again I am afraid). Always use colouring gel/paste like Sugarflair . I add my colour to the meringue as you can control the colour better at this stage and ensure it is evenly mixed. One thing to watch for is that the shells loose some colour in the oven (see later on this one and the trials of preserving colour) so don’t be too frightened if the colour looks very vivid in the mix, it will fade later.


Beating down the mixture
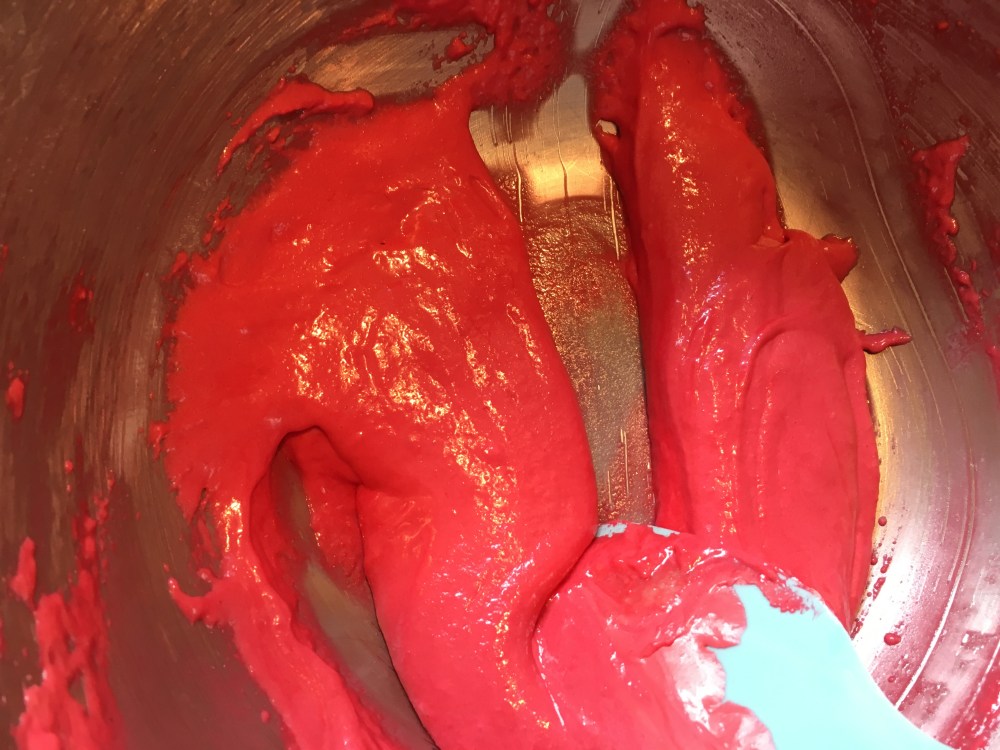
The French call this stage Macaronage. You have to make the perfect meringue to get the moisture levels down as low as required for the controlled rise …. and then you bash out most of the air so your mixture is just fluid enough to make the perfect smooth shell. If you don’t do this enough then the shells will have peaks on them after you pipe them rather than being nice round discs. If you do it too much the shells will lose their shape. At best they will be very flat. At worst you will get a sheet of macaron mixture as I did.
You are aiming to beat it down to the point where the mixture flows like lava after you drag a spoon through it. Think all those nature documentaries on volcano lava flows. I use a spatula to do the beating down and stop and check the consistency every few seconds. This excellent YouTube video shows better than any words I can write, and I think this picture gives you an idea of the consistency you are aiming for, though I suspect I have tendency to go a little too far so for my next batch I will hold back slightly.
What to bake on
You need to prepare your baking sheets before you start. I swear by baking parchment but get good quality parchment (Lakeland do a superb one) and definitely not greaseproof paper. Frankly, avoid the silicon mats with macaron shell shapes on them. The lip does help with the piping, but tends to inhibit the foot development and I found the shells can stick to them or get damaged by the lip when you take them off. The last option is Silpat but get the real stuff, not a cheap version. I haven’t tried it yet but it is the choice of professionals though I have read that it creates a hotter base than paper so you will need to experiment with cooking times.
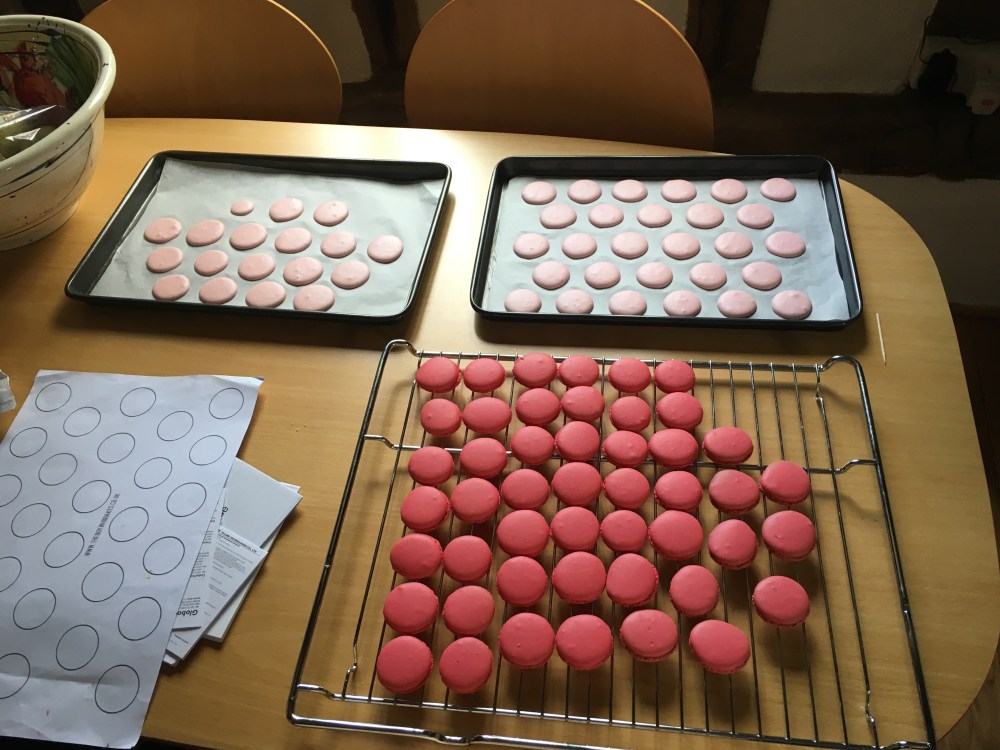
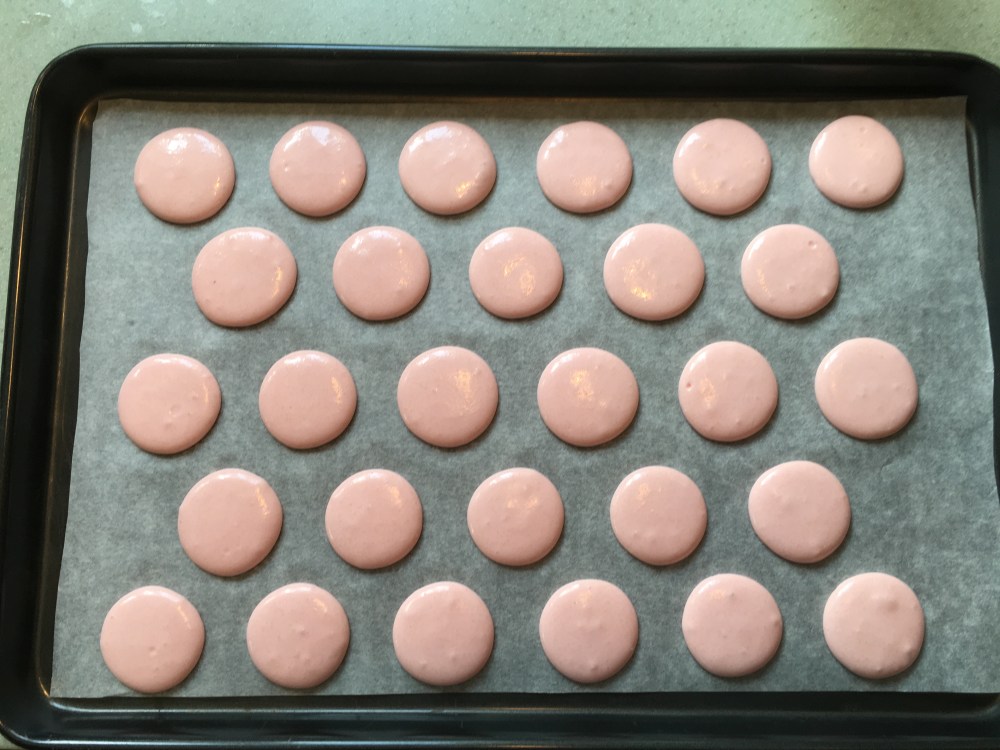
Piping
Arghhhhhhhhhhhhhhh. Piping is my baking nemesis and I haven’t yet done a batch where all the shells are about the same size. The keys to success are to use a paper template under the parchment to act as a guide (here’s one but google to your hearts content on this), mark the dead centre of the circles, hold your piping bag about 2cm directly above the dead centre mark, and pipe as fast and as accurately as possibly. I find piping with pace whilst counting out loud “1 plus 2 plus”, once you have the technique, helps you get a rhythm going which means you pipe similar amounts of mixture for each shell. Also always stop regularly to tighten up your bag. Lastly always try to use a bag holder to avoid handling the mixture too much or you will inadvertently be repeating the Macaronage stage and end up with too fluid a mixture towards the end.
Remember you need to leave space for the shells to spread (the template sorts that for you) and if you have beaten the mixture down too much they will spread into each other. If that happens, take a deep breath, carry on and use the finished product for some other dessert (Eton Mess, Trifle or scattered on ice cream are my preferred uses)


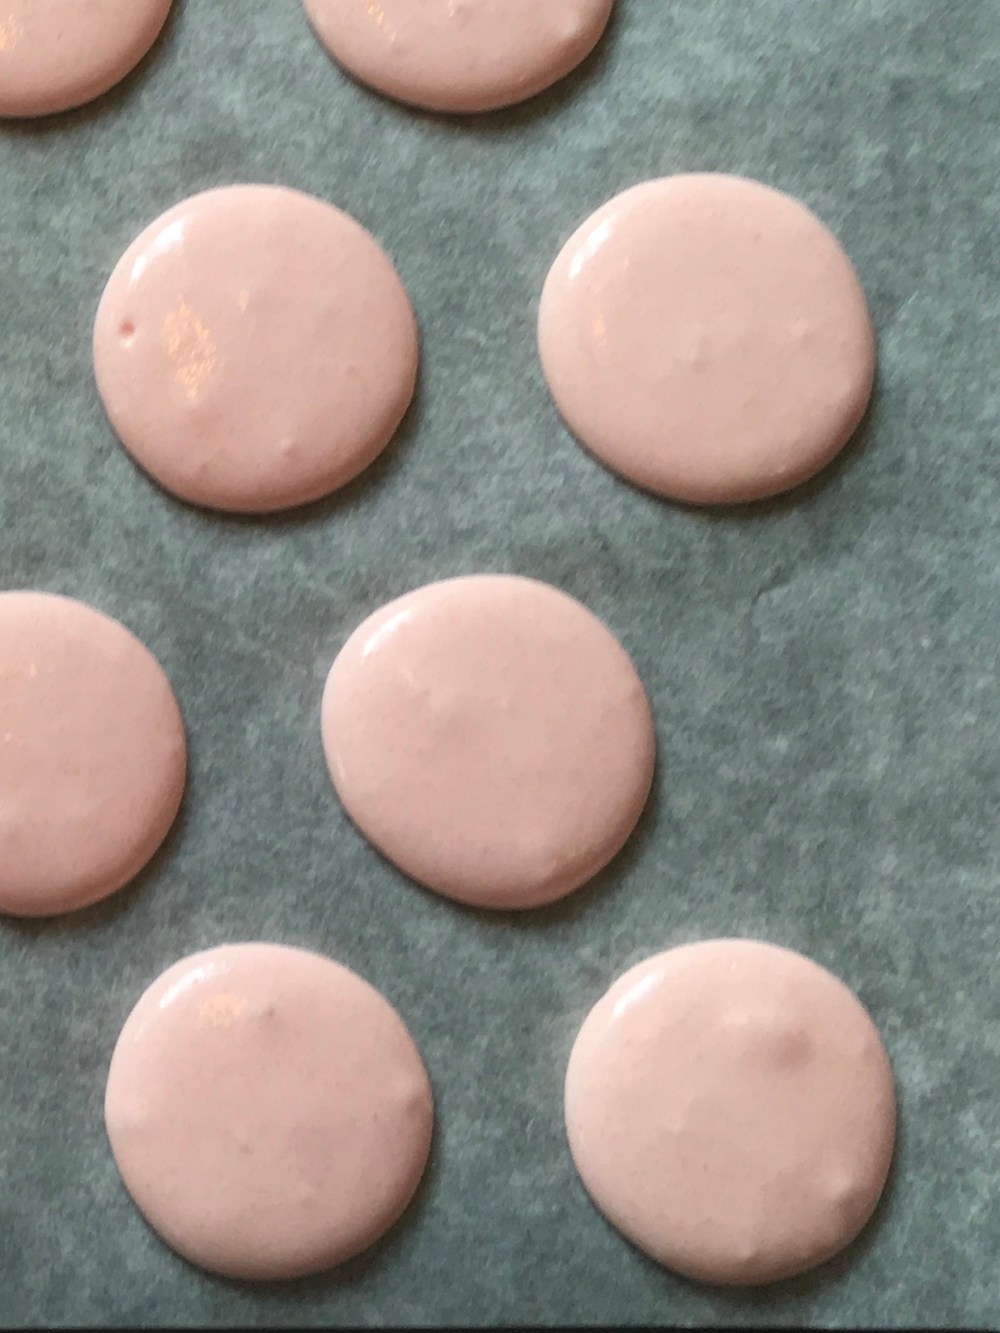
Tapping out the air bubbles
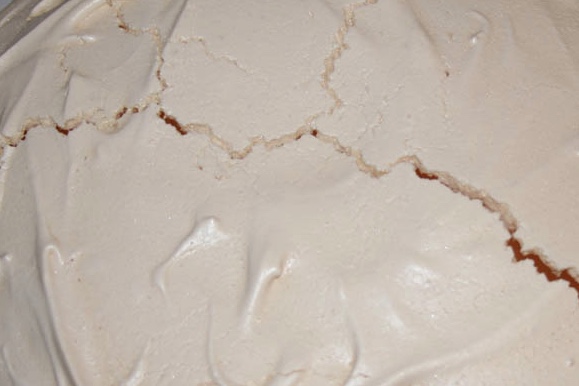
You can help yourself by getting rid of the worst of the air bubbles in the piping bag first (lay it down on the work surface and press the mixture gently towards the top of the bag ), but you can’t get rid of them all. By rapping the baking sheet onto the work surface you are bringing the remaining air bubbles to the surface and smoothing the peaks off the shells. Use a toothpick early on to burst any visible air bubbles that show on the surface. Do this straight away or else the mixture won’t flow into the hole the air bubble has created, and focus on the biggest ones. You can see on this picture how the air bubbles have risen to the surface and in some cases burst through.
Resting and drying the shells.
This is yet another one of those moisture extracting steps which if not done right will contribute to shell cracking. It is also key to getting those famous feet. The recipes say allow the shells to dry for 30 minutes until the shells are dry to the touch. The reality is that the time needed for this stage is very variable. If you didn’t age the egg white or get enough water out of the meringue then this stage will take a lot longer. If it is also humid outside as well, it can take a good hour to hour an a half. I have even had one steamy summer evening when it took 2 hours to get to the right point. You are aiming for quite a firm skin on the top, almost like very thin leather, and when you brush your finger across the top you should sense some surface tension in the shell.
What is going on here is you are creating a top that is strong enough so that as the steam in the shell tries to escape (causing the rise) the shell cracks at the weakest point at the base of the shell which is still moist. Dry the shells too much and you won’t get the lift. Dry them too little and they will crack across the top.
The Bake
Now this one is where it all can go horribly wrong and you need to get to know your oven. I had this all sorted with my last oven but I am still finding my feet with the new one. Bake too little and the shells will be too soft (you will soon find out when you try to lift them off the paper), bake too long and they will lose too much colour. Don’t let the moisture out of the oven during the bake and again the shells will be too soft. I have made all these mistakes over time.
I know people worry that if the shells come out too hard they won’t have that crisp outside and unctuous chewy centre. I have found though that even the over baked shells are fine once they have spent a day in the fridge with the fillings in them, as it is really the filling that seeps moisture back in to the shell creating the texture you want, rather then the bake itself. There is nothing worse than a soggy under baked macaron I am afraid.
I now bake on 180c/ 160C for 10 minutes, then open the oven briefly to allow the steam out, and then check back every minute thereafter. 12 minutes usually does it but sometimes it is a little less and sometimes a little more. If you gently touch the shell on the top it should feel firm. If there is any give then the shell is not baked.
A couple of other tips: Put a baking sheet directly above the shells which helps stop the tops losing colour and cool the shells on the baking tray to allow heat to continue to penetrate the bottom of the shell. Don’t attempt to lift them off the paper until they are cool. If the shells stick to the paper I am afraid you are done for – you haven’t cooked them long enough.
Fillings
There are a huge legion of fillings (Pierre Herme’s gorgeous books are an inspiration on this one), but I think citrus favours and dark bitter chocolate are best as they cut through the sweetness of the shell. Lime white chocolate ganache is a particular favourite, but I recently did Raspberry Dark Chocolate Ganache (see my recipe here) which I thought was delightful (the hubby was less keen). French butter cream is also a good option, especially as it uses up the egg yolks you have left over from the macaron recipe. I was even recommended trying Roquefort by one restaurant recently which I will definitely try soon as an informal taste with some broken shells was delicious. Let your imagination go wild on this one but think about the colour combination in the shell.


Maturing the Macaron
This is absolutely essential. Macarons are always better if you leave them for 24 hours in the fridge. This allows the flavours to combine and more importantly the inside of the shell to soften to the right texture. I know it is tempting to dig straight in, but patience is the watch word here. After 48 hours though they start to get a little too soft.
Keeping your Macarons
Here is one they don’t tell you about. Keep them in the fridge if you want to serve them the next day (and bring them back up to room temperature) but macarons also keep really well in the freezer. There is a lot of work in these little jewels but you can do them days in advance and then get them out 24 hours beforehand to mature in the fridge. Alternately if you don’t eat all your batch, you can whip what is left into the freezer which arrests the maturing process and stops them getting too soft.
The Recipe
There are lots of recipes out there with slightly different mixes. The wetter the mix the harder the recipe to get right in my opinion. This is the one I use and, by the way, a set of scales is essential for Macarons. Cups and measuring jugs are just too inaccurate. I have included it below but you can also see it on my post about making a Macaron Piece Montee here.
So that’s it folks. I am afraid there is no short cut to these, but conquering them is perfectly possible, just keep on trying and if you really despair like I did, book yourself on an evening course.

The Recipe I Use
The Ingredients
For the Paste
- 170g Icing Sugar
- 170g Ground Almonds (before sifting – you lose about 10g in the sifting)
- 60g Egg White – about 2 medium eggs
For the meringue
- 60g Egg White – from about 2 medium eggs
- 160g caster sugar
- 50ml water
The Method
Prepare your equipment
- cut out baking parchment and lay across a few baking sheets
- get your piping bag ready
- make sure all your bowls are scrupulously clean and free from grease
- make sure you have an electric cooking thermometer which is working
Prepare the almonds
- combine the almonds and icing sugar
- put through a food processor or grinding mill
- push thorugh a sieve throwing away the last big pieces (about a dessert spoon full)
Make the meringue
- put the egg white in a bowl (prefreably metal) in a stand mixer with any splash guard removed
- put the water and sugar in a saucepan
- bring to the boil (but do not stir at all) checking the temperature
- when the temperature hits 110C start whisking your egg whites
- when the temperature hits 118C take your sugar syrup off the heat
- QUICKLY check your egg whites are very stiff and dry (they should be)
- gently pour the sugar onto the egg whites with the whisk still going
- carry on whisking until the mixture has gone back to room temperature
- add food colour of choice
Make the Paste
- combine the remaining egg white with the ground almonds and icing sugar and mix to a thick paste
- add the meringue to the paste
- beat down using the macaronage method (see above -turn, fold and flatten with a spatula is effectively what you are doing)
- check for the consistency and once it flows off your spatula you have it at the right consistency
Pipe and Dry Your Shells
- add your mixture to a piping bag with a 1 cm nozzle
- press out any air as well as possible
- pipe the shells as close in size as possible
- rap the baking sheet sharply on the over surface to bring any large air bubbles to the surface
- burst any major air bubbles with a tooth pick straight away
- leave your shells to dry for 30 minutes to an hour until they have a dry skin on them (brush your finger across the top to test for this)
Bake
- heat you oven to 180c / 160C fan whilst the shells are drying
- bake the shells in the middle of the oven for 12 minutes
- place a baking sheet directly above the shells
- after 10 minutes briefly open the oven door a small crack to allow steam out
- check the shells after 1 minute to see if they are cooked
- carry on doing so 1 minute at a time
- allow to cool on the baking sheet
- peel off the paper and store ready for filling

One Comment Add yours